
Road conditions and summer’s bright sun are the enemies of your headlight covers. Over time, the finish on your car’s headlamp deteriorates and degrades, leaving the lens cloudy, and your lights dim. Not only is it harder for you to see in the dark, but it also makes you less visible to other drivers and pedestrians. There are several ways to fix this problem. The most expensive, yet possibly most effective way is to trade your car in at the dealer and get a newer car altogether. Of course, most of us aren’t looking to replace our ride just yet, so that leaves replacing the headlamp cowl, taking your car to a dealership or other maintenance facility and paying them to do it, or finally, just doing it yourself. Fortunately, this isn’t a hard task if you have a little patience. Headlight lens restoration isn’t as hard as it sounds!
What You Will Need
 Fortunately, everything you need is available at your local big box hardware store and auto parts store. Here’s the list!
- Glass Cleaner
- Lint Free Paper Towels
- 1000 grit wet/dry sandpaper
- 2000 grit wet/dry sandpaper
- Water
- Polishing compound
- Flannel cloth
- Rubbing Alcohol
- UV Protectant Sealer
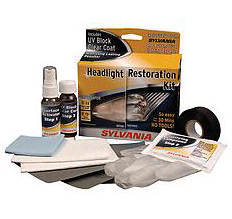
Image Right: Sylvania Headlight Restoration Kit available at Advanced Auto Parts
Cleaning your Headlights
Headlight restoration can be performed on the car, or you could remove the lens if you desire, though the process doesn’t require such an effort. Start by just a simple cleaning. Grab your bottle of glass cleaner or degreaser and a paper towel, spray the headlight cover, and wipe off the excess dirt. You might notice that the cloudiness appears to clear immediately, but that is just the effect of the cleaner. As soon as the cleaner dries, you’ll be back to the cloudy UV ray destroyed lens.
Next, protect your paint! Cover the areas of your car immediately surrounding the headlamp with tape to safeguard against damage to your clear coat. The next steps are sanding, polishing and applying the UV sealer, and you certainly don’t want those on your car’s finish.
If you have purchased full sheets of sandpaper, cut one in quarters. Wet the rough side of the 1000 grit sandpaper quarter with water (we find that a spray bottle works best) and sand the headlamp using straight horizontal strokes and even pressure throughout the surface of the lamp. This doesn’t require a huge amount of sanding, just enough to buff off the discolored layer and pits. It is important to keep the sandpaper wet throughout the process. Rinse the headlamp, then get ready for the next step. Wet the rough side of your 2000 grit paper and go over the whole headlamp again, this time sanding up and down in straight strokes, at a 90-degree angle from the 1000 grit strokes. Once again you must ensure that the surface remains wet through the whole operation. This process smooths the surface from the 1000 grit abrasion.
Here's a video from Eric The Car Guy demonstrating a DIY headlamp restoration kit.
You’ll notice that your headlamp is already beginning to look clearer, but you’re not done yet. It’s time to break out the polishing compound. Using the flannel cloth, apply polishing compound using a light touch and circular motions. This process is buffing out the last of the scratches, be sure that you are not pressing deeply into the lens, causing new scratches to appear.
When you have wiped off all the excess polishing compound, it is time to make the final preparation to apply the UV sealer. Using a lint-free paper towel and the rubbing alcohol, gently wipe away any final remnants left by the process. It is imperative that the lens is as clean as possible before applying the finishing sealer.
At this point, you should be feeling pretty good about yourself. The headlamp should be sparkly clean and clear. The final phase is to apply the UV protectant sealer. Skipping this step will render all your hard work useless in just a few weeks. A proper application of protectant will keep your headlamps clear much longer. There are several types of sealant available, from creams to spray bottles and aerosol cans. Creams tend to take longer to dry, but spray bottles and aerosol cans tend to overspray. If you are using either of these methods, ensure your car’s finish is covered with a tarp or plastic before application. After applying the protectant, wait until the lamp is dry, then apply a second coat.
 Now for the very last step. Turn on your lights, step in front of your car and smile smugly knowing that you just saved yourself a few bucks! You no longer have cloudy headlights!
Removing the haze from your foggy headlights isn’t just a cosmetic improvement, it is a safety improvement as well. States that require an automotive safety inspection all have headlight brightness as a checkpoint. If you don’t feel confident in your ability to properly clear your headlamp lenses, then give us a call at Mike Duman's Service Center to have the work completed. Seeing clearly in the dark can not only save your life but the life of others as well.
